Wednesday, July 13, 2011

Life (or how a half-marathon turns into chocolate chip pancakes)

So it's been a while, and I apologize for the long long long delay between my last post and this one. A lot has been going on! I'll quickly fill you in, and encourage you to check out the website in the coming weeks as I have more time to work on it and add new goodies to try!

I finished up my year teaching preschool; a bittersweet moment to be sure as I will certainly miss my little kiddos, but I am very excited to be living more in the heart of the city, and getting a chance to do more cooking and baking at work. (You should definitely come check out the cafe- we have breakfast all day, awesome smoothies and a great outdoor patio!)

I also was able to visit an awesome friend of mine (and make some new ones!) in Alaska, which happens to be one of my all-time favorite places on earth! :) The two of us were going to run a half-marathon together, and what had started out as a strict training regimen got gradually pushed to the side as both of us became busier and busier... and busier. So when Saturday morning rolled around, and I hadn't carved out time to run even just once in the past two weeks (and prior to that had just gotten maybe one to two runs in a week)... hitting snooze seemed like a much better idea than jumping out of bed and going to run 13.1 miles. We had a delightful breakfast of chocolate chip pancakes on the roof, overlooking gorgeous Alaskan mountains. I wouldn't have changed any part of it! That same trip, I also got to go rafting in Talkeetna, fly in a 6-person plan around Mt. McKinley AND get out on a glacier up there too, see a mama and baby moose suuuper close up, smoke a cigar, and have some great chats with some amazing people. :) What an incredible world we live in!

I have realized that "the best laid plans" really do not always go according to plan... and although I chose not to run a half-marathon at that time, there will be others (perhaps the same one next year!), and I am excited that each day is a new one, and with it comes the ability to make choices that bring me life and let me bless others.

NOW, onto some baking news. I had been really pondering how many calories one really consumes when they eat a cupcake.... possibly because how often do you go into a bake shop and see nutrition facts posted or available? Ummmm... never. (I suppose that's because we don't really want to know...) Anyway... I found this article through NPR (http://www.npr.org/templates/story/story.php?storyId=10328143) which discusses the calories in popular NYC bakery cupcakes. A vanilla cupcake ranges from 386 to almost 800 calories. YIKES!

I decided to do some experimenting with different ratios of sugars, flours and fats, along with different ingredients... and came up with some pretty good combinations! I'm going to tweak them still, as I used olive oil instead of butter (which gave awesome texture but tasted a little too olive-y for my liking). But here's the best part.... the cupcakes (sans frosting, since I haven't played around with that yet) were all under 200 calories! One clocked in at 161 per cake! That means even with frosting, these new cupcakes are way worth the "indulgence" (since they'll still be no more than 250 per cupcake).  For one mix, I used honey, ground flax, and olive oil to replace granulated sugar and butter. Now, you can have a cupcake that tastes great, and has great things for your body too!

More updates (and photos!!) to come soon! 

Monday, May 23, 2011

Sous Chef for a day

One of my very best friends got married on Saturday (wooooohoooo!!!) and although the forecast throughout the majority of the week was rain all day Saturday, God delighted us with a gorgeous sunny day! She was a beautiful bride, and it was a beautiful day!

Then Sunday morning came... a little more tired than usual, I woke up for class. Imagine my surprise (and panic) when my clock said 6:32, which is already two minutes later than I need to leave my house, not to mention the fact that I still had bright pink fingernails (a major no-no in the culinary department). So after a stop at CVS for fingernail polish remover, since of course I couldn't find any at my house, I arrived to room 301 twenty minutes late. Apparently, I wasn't the only one who hadn't shown up, and our chef had already combined groups. This left me joining a group to make a group of 5, which is really not desirable, since we would be getting in each other's way all day. After apologizing for my tardiness, (which was appreciated and accepted), chef looked around and decided that it might be best for me to work with him for the day, doing side work and prep. He asked if I would be alright with this, to which I casually (as casually as I could anyway) said, "Sure!" 

Getting to work with the chef all day was busy, busy, busy, but awesome! I got to prepare different kinds of dough for demos, make Russian braid, hazelnut, apple, and cream cheese fillings, and pastry cream. I did start to feel a teensy bit self-conscious when other people in my class started calling me "sous-chef"; it was sort of reminiscent of being called "teacher's pet" in elementary school. It was nice to have answers to questions and be able to help people out, but I don't at all like it when I feel that people think I think I'm somehow better than them. (Know what I mean??)

Anyway, after being on my feet all day, learning tons of things about pastry, the huge box of goodies I brought home from class included the following delicious items: 

Russian Braid

Tea Rings (2 of them)

Banana Bread muffins
Sour Cream Coffee Cake muffins
Croissants

Danishes

and last but not least, Brioche with hazelnut filling, chocolate sticks and crumb topping

Anyone in the mood for some pastries? :) 

Chef said I did a great job on my tea rings (he might have even said they looked better than the ones he made that day for the demo!) 

Check out how you make them here:
After preparing the dough, you layer it with cinnamon filling and cake crumbs (which help absorb moisture). That 1-2 inches of open dough on the left is important.. you'll see why!

 Then you roll up the dough, not too tightly, not too loosely. (Here is the chef making a demo ring). 

Then, tuck the end of the cylinder into the dough that didn't have the filling, making a ring. 

 You then cut the dough at an angle with scissors, fanning out the cut pieces just a bit. 


After baking, the tea ring gets a glaze of apricot nepage and cinnamon roll glaze. (I put some sliced almonds on one ring too!)

Besides all the exciting baking in class yesterday, I also did a lot of other baking. For my friend's dress rehearsal dinner, I made vanilla-coconut cupcakes with 3 different kinds of buttercream: coconut, lime, and chocolate (so so so delicious!). Here are some pictures of those: 
 The "trial" cupcakes to test the frosting :) 
(coconut buttercream in the front)

 Chocolate buttercream: pre-toasted coconut

 Lime buttercream (with the swirl and sugar sprinkles)

Big cupcakes (regular size) with coconut mixed into the batter, chocolate buttercream and toasted coconut. 

Also, I made gingerbread men with my kiddos in school on Friday. They loved it! (And the hallways smelled like Christmas!) I decorated some and then they each decorate their own as well.. nothing like bringing home two cookies instead of one! 


Monday, May 16, 2011

Sticky Buns and Cinnamon Rolls :)

Sticky Buns.. a-ma-zing.

I've moved from artisan breads which are mostly lean, meaning they don't have any, or very little, fats and/or sugars, to viennoiserie... which is essentially baking with doughs that are made of butter, butter, and more butter (and maybe some sugar too). Although I certainly can't eat anything I made yesterday, I can definitely admire the products and enjoy giving them to people who can eat them (and love to!)

Really though, these doughs, known as enriched or sweet doughs, have a lot of butter... our laminated dough formula (used to make croissants and danishes) contains 20% butter of the final dough weight. And not just any butter, mind you, but butter that has at least 82% fat. Our chef (who is awesome! he's been a vegetarian for 32 years for health reasons, and can deliver hilarious one liners without cracking a smile, plus he is great at challenging us to challenge ourselves).. anyway.. our chef prefers to use "plugra" butter.. which is a play on the French words for "more fat" (plus gras). 

So for my first day, which was the longest by far at 12 and a half hours, we were going non-stop all day... and I LOVED it! First, we made some laminated dough, which would later be used for croissants. The process is crazy, and let me tell you, those "crescent rolls" that pop out of a can have nothing on real croissants. Without telling you every single step... the basics are: you use a sheeter (a manually-directed machine that rolls dough back and forth, making it thinner with each pass) to create layers of butter and dough. By the time you get to the last step, you essentially have a dough that is layer upon layer upon layer of dough and butter- which makes for beautifully flaky pastries. See what I mean...
Check out these layers!

Chocolate croissants

Notice how these are darker than you typically see in grocery stores, etc. 
Chef says that many American pastries and baked goods are underbaked, 
because we see darker coloring and think- burned!!! But, this isn't the case. 
These croissants have perfect coloring (they've been egg washed twice). 

One step of the lamination process- the tri-fold.


Dough on the sheeter.

Chocolate croissants ready to proof.

Rolling up a chocolate croissant. 

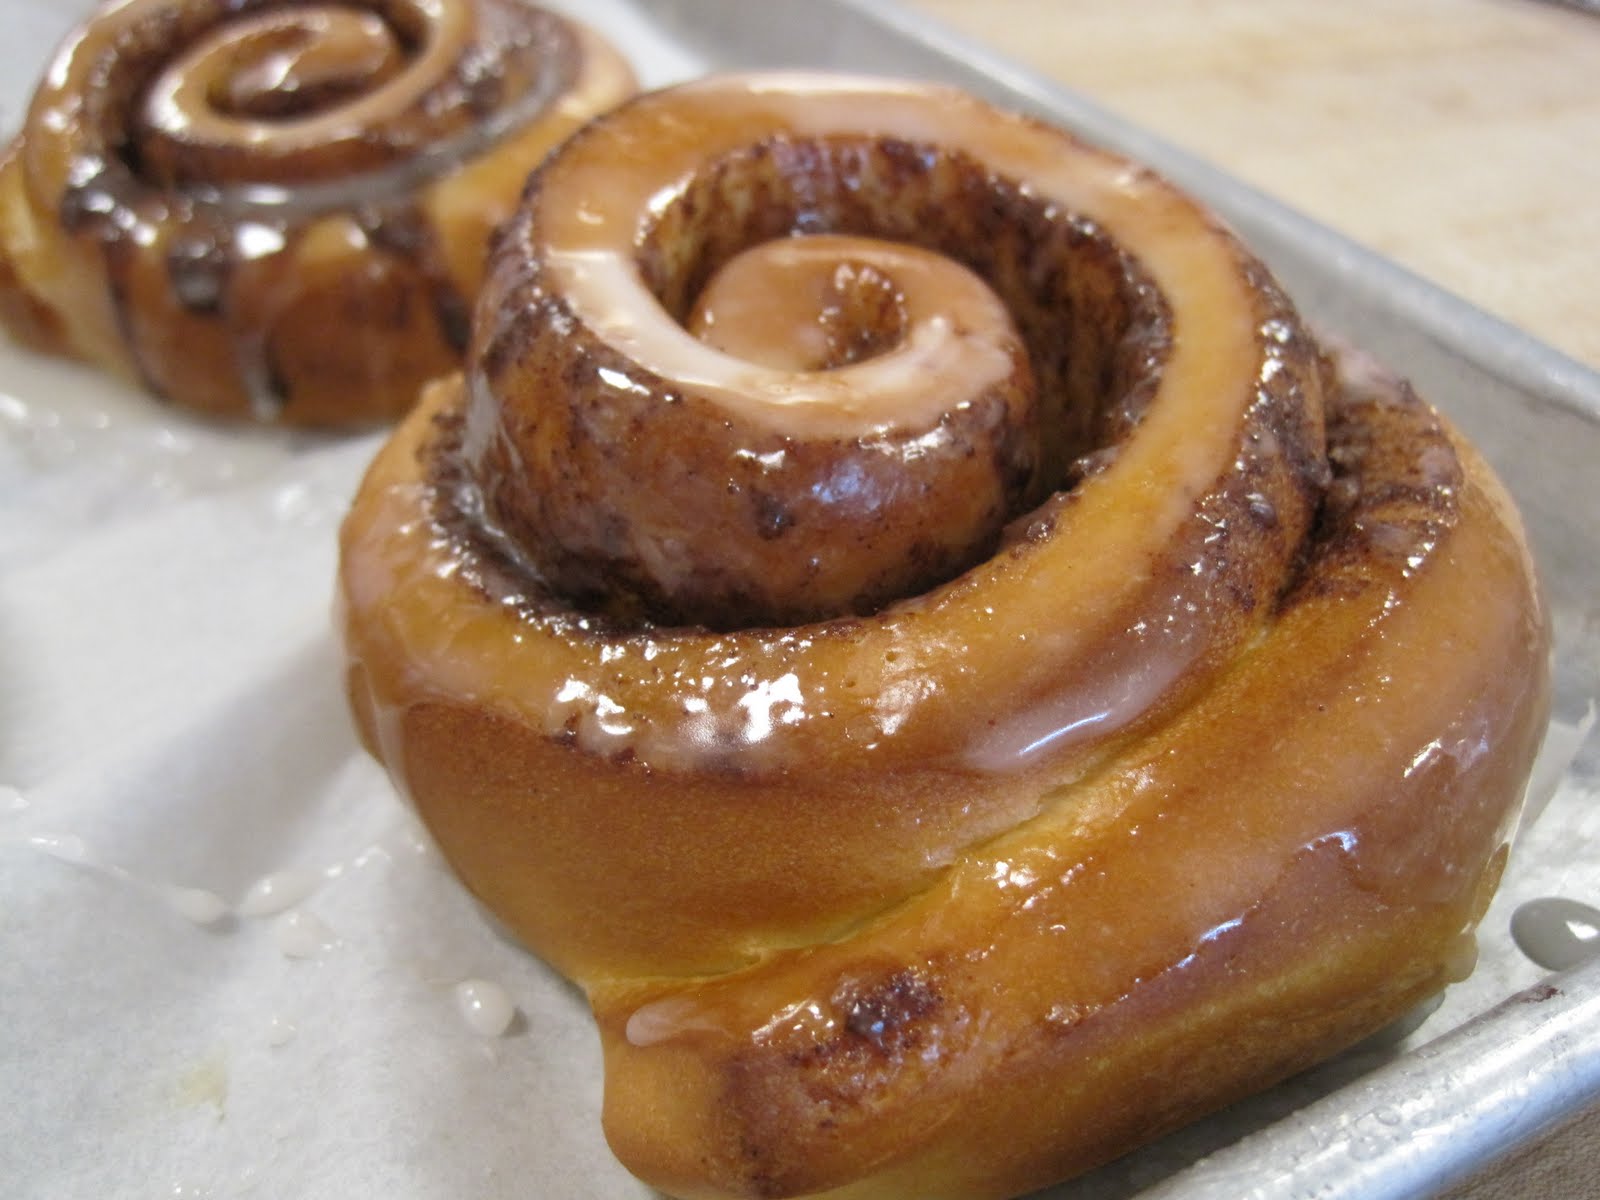
We also made sticky buns and cinnamon rolls... which again, are much darker than we typically see them. Also, chef noted that he puts the glaze on the rolls while they are still hot, so that the glaze seals in over the roll combining with and complementing the other flavors and textures of the roll, rather than waiting until the roll is cool, so there is a layer of white sugar on top. Sticky buns start out as cinnamon rolls, but they get a special home in a muffin tin coated with a brown sugar, honey & butter smear with pecans. The bottom of each bun then becomes the top. 
Rolling up cinnamon rolls

Making sticky buns.

Our cinnamon rolls (pre-glaze)

Sticky buns!! 

Cinnamon rolls!

I brought home a HUGE box full of cinnamon rolls, sticky buns, croissants and brioche. HUGE. I have no room left in my freezer. Stay tuned to see what yummy treats I get to make next week! 

Wednesday, May 4, 2011

Pitas are my new favorite bread!

So this post is a few days late... but things have been a little busy outside of class! (I'll update on that later.)

Class was a little crazy too! By 10am, we were down to 2 people in my group (including me!) and we actually made all of these breads:

Ciabatta


Challah

Pita

Baguette

Sesame Crackers

Out of all these awesome and delicious and different breads, I've gotta say my new favorite is pita, if only because it is the coolest ever thing to watch bake! I tried to find a good video online to share with you all, but it's so much neater in person, you should just make some at home! :) All you need is a pizza stone and a peel to move the hot bread around. (If you can't bake it at home, then I guess a you tube video will do!)

So we did a repeat of ciabatta, challah and baguette... we got some extra practice on ciabatta and baguette, since those two breads will be on our final practical (this Sunday!). The challah my group tried again, since we didn't get it right the first time... and again... we missed a very small thing, but it turned out to be a big problem later! We used regular instant yeast, instead of osmotolerant yeast. Osmotolerant yeast reacts differently with the sugars in the dough, and because we didn't use it, we had to proof our dough for nearly 4 hours!! (Instead of 2!!) It looked fine, and tastes delicious... definitely different than before!

We also made some sesame crackers, with sesame and wasabi sesame crackers. They had a little bit of milk in them, and butter, but I tried them anyway. I really don't like not knowing if something that I've made is good or not! Getting the crispy cracker consistency is harder than I realized! But they were tasty little crackers (especially with the little kick of wasabi!)

Now for the most exciting part of the day... the pitas!!!!

I don't know about you, but I've wondered since I ate my first pita sandwich how they heck they get that pocket in the middle. So I was so excited to finally find out how pitas are made. The dough itself is quite simple, and the shaping isn't too difficult either. You take a chunk of the dough, and roll it around in your hand on the workbench, but not like a snowball. You keep the same surface touching the palm of your hand, so that the little ball of dough gets a "belly button".

Now, once the little dough balls have their belly buttons, they need to rest for a little bit, and then you roll them out into flat disks, 1/8th inch thick.... no thinner, no thicker!

From here, its off to the oven, where the magic happens! The flat disks are loaded into the hot, hot oven (500 degrees), so they're not touching each other, and after just a couple of minutes, you start to see the yeast bubbles pop up on the surface of each pita. The dough starts to look like its alive as all the bubbles join together, and when they all join together, the pita puffs up like a whoopie cushion. When most of the pitas are whoopie cushions, you take the peel and scoop under all the pitas, which kind of act like balloons! While they're still on the peel, you very carefully and quickly flip over each pita, and put them back in the oven. The puffing up process is even faster the second time, about 10 seconds, and then all the pitas come out of the oven.
(Here's a peek at the pitas puffing up in the oven)

I had to check one of our pitas, just to make sure it really did have a pocket... and sure enough, it did!! Here's the pocket (which you can fill with lots of yummy delicious things!)


This next class will be my last breads class... there's so much more I'd love to learn about breads! Its fascinating to learn how breads bake!

Monday, April 25, 2011

Two tips for dairy-free and gluten-free baking!

Even though I didn't have class on Sunday and got to sleep past my customary 5:45am wake up time, I still got to do some baking this weekend. I suppose I should use a word other than "some", since it definitely was more than "some". Anyway... first of all... I realized even more how much I love, love, love baking... especially when I get to bake for people that I love (i.e. my wonderful family!)! 

Our Easter dinner dessert menu included: 
Dairy-free, gluten-free carrot cake cupcakes with dairy-free or regular cream-cheese icing
Dairy-free, gluten-free brownies
Dairy-free gingersnaps with candied ginger

Everything was delicious (if I may say so myself!)... and I learned some things I thought I'd pass along to those of you who'd like to try dairy or gluten (or both!) free baking. 

First... the best dairy-free butter to use is definitely Earth Balance Vegan Buttery Sticks. They have a good butter flavor, are better for you, and bake very similar to butter. I tried the brownies a couple of times, and when I used shortening instead of the Earth Balance sticks, the brownies were much more cake-like: not as dense or chewy. 

Second... don't be afraid of using gluten-free flours. I used Bob's Red Mill Baking Flour (and added some xantham gum) and although I was concerned that it smells and tastes bitter prior to baking, it bakes very nicely. The brownies and the carrot cake both had ideal consistencies, and there was no funny taste at all when they were done. (In fact, they smelled delicious!!)

If you want to try them out.. feel free to check out my website, you can order a batch and I'll get them out to you ASAP! Then you can weigh in on if it truly is possible to have delicious baked goods made without "butter" or "flour"! 


Friday, April 22, 2011

Chocolate Doesn't Come from Cows

.... I know, crazy, right?? 
I was standing just to the side of the checkout at a grocery store the other day, carefully reading each and every label on the chocolate bars... since they hide milk in EVERYTHING... and when I had finally found two chocolate bars with no dairy at all (a cranberry-almond one and a raspberry one), I actually got into the check-out line to pay. Now unbeknownst to me, the check-out lady had been watching me the whole time, and said rather peppily.. and almost a bit mockingly (it could have been that I was already on edge just because of the day I'd had up to that point)... "Tough decision, huh??". I looked at her and replied, "Yea, I can't eat dairy, so I have to read all the labels first." "Oh", she said. Pause. "They can make chocolate without milk in it?? Really?" 

So I'd like to dispel a commonly-held belief.....chocolate doesn't come from cows. 

It comes from the cacao tree (cocoa beans) and is processed to create chocolate liquor, which can be further processed to produce cocoa solids and cocoa butter. Maybe the "butter" part of "cocoa butter" is what gets people confused. But... just like peanut butter, it has no dairy in it. The more cocoa solids chocolate has in it, the darker it is. The reverse is true as well... white chocolate only has cocoa butter in it, no cocoa solids at all. Unsweetened chocolate (for baking) and dark chocolate are the only chocolates that don't have added milk, however. Even the dark chocolates are hard to find without some kind of dairy in them. 

My co-teacher, who was born in, and lived in Russia until her 20's, said to me, "Why do they add all that stuff to chocolate? Chocolate is chocolate! If you want candy, go eat candy. But don't mess around with chocolate! We don't do that in Russia." :) 

Sunday, April 17, 2011

Holla! bread... (I couldn't resist)

Yea, yea, I know it's "challah" bread... but when you spend 12 hours baking it (and various other lean & enriched breads) it's gonna get said that way at least once. (Or twice even). ;)

Here's the thing about challah bread that no one tells you when you buy it... it is made from SIX strands of dough. Yup. Six strands. Imagine braiding hair (this will be even harder if you've never braided hair in your life... just work with me here) using 6 different sections- if you lose your place, you're done, and it's back to the beginning to try again. Like I've found to be true with much of what I've been learning, practice really does make perfect; the more you practice a skill like challah braiding, the faster and more accurate you become. Case in point- our chef braided his loaf in about 30 seconds (after demoing it very slowly for us) without missing a beat. Here's chef working on his demo:

After saying the 4 step process in my head over and over again, I got my entire loaf braided on only the second try! (I think I owe a huge part in my success to braiding lots of hair and making lots of bracelets as a camp counselor! Yea Deer Run!) Here's my loaf prior to baking: 

Now here's the sad news about this challah bread.... we somehow forgot to add the granulated sugar, which resulted in our chef saying, "Ummm, you have a problem here," when we checked our loaves mid-way through baking. Not only are they waaaay to light to be challah bread, they also had a crusty crust (definitely a no-no for challah bread). When we ventured to taste them, our chef's statement that we must have forgotten the sugar was definitely proven true- it was like eating baked flour- not so pleasant.
You can see how crispy it is here- all those little lines are cracks in the crust. We're making it again next week to practice (and get it right this time!). 

Today we also made ciabatta, which is the craziest dough I've ever seen! You could hardly call it dough... it's more like the blob, oozing to cover ever surface it comes in contact with. It is a wet, sloppy mess that somehow when baked, makes for an amazingly flavored bread, absolutely perfect for sandwiches with lots of "wet" ingredients (think grilled veggies drizzled with balsamic, melted cheeses, the list goes on... mmmm!). 
"The Blob" (aka ciabatta dough)

Our ciabattas after baking (delicious!)

While our ciabatta and challah breads were proofing, we made up some scones. Each group had to come up with their own flavoring ideas; my group decided on doing both sweet and savory. For our sweet scones, we made a combination of cranberries, chopped apricots, and lemon zest soaked in freshly squeezed orange juice. One whiff of that mixture, and we knew we had a winner! I sampled a bite... and they are AMAZING. 

Our savory scones were, if possible, even more amazing! We chopped up some sun-dried tomatoes, fresh spinach, and onion, then mixed in some feta cheese and finished them off with a sprinkle of parmesan-romano cheese. Whoa. They were SO good (I tried the tiniest of bites, and was blown away!)


Finish product: 


Scones- fresh ones- are simply wonderful! They are soft, a tiny bit crumbly, and delicious! Once I get a good recipe for dairy-free ones, I'll be sure to let you all know! I'll also try working on a gluten-free one. I have a HUGE respect for bakers who are coming up with gluten-free baked goods- it seems that every other word in a bread lab is "gluten"- that's how important it is to baking good breads! 

The good & the bad of the day (we showcase one of each for a critique at the end of each class).